
Introduction
Knowing how to install a ceiling lamp is a valuable skill that can brighten your home instantly while saving you from costly electrician fees. Installing a ceiling lamp yourself may seem daunting at first, but with the right tools, safety precautions, and step-by-step directions, you can complete the task confidently and safely. This guide will explain how to install a ceiling lamp with clear instructions, ensuring your new lighting fixture is secure and functional. Learning how to install a ceiling lamp correctly will also allow you to update your home’s lighting anytime you want.
Table of Contents
1. Choose the Right Ceiling Lamp and Location
Before you start installing a ceiling lamp, it’s important to pick the right type for your room and decide on the best location. Different ceiling lamps serve different purposes—flush mounts, semi-flush mounts, pendants, and chandeliers all offer unique lighting effects and installation methods. Generally, ceiling lamps should be centered in the room to provide the most balanced light distribution. However, avoid placing a ceiling lamp directly over beds or seating areas if the light may be too harsh.
Measure your ceiling height and room size to proportionally select a ceiling lamp. For low ceilings, flush mount lamps are ideal, while high ceilings can accommodate pendants or chandeliers. Also, ensure your chosen ceiling lamp’s weight is compatible with your existing ceiling electrical box, as some heavy fixtures need reinforced mounting.
2. Gather Tools and Materials
How to install a ceiling lamp begins with having the right tools and materials ready. Gather everything you need before turning off power and starting the work. Essential tools include:
- Voltage tester for safety
- Wire strippers to prepare wires
- Screwdrivers (Phillips and flathead)
- Needle-nose pliers
- Electrical tape
- Wire nuts for secure connections
- Ladder or step stool
- Safety glasses and insulated gloves for protection
Make sure your ceiling lamp installation kit contains mounting brackets, screws, and decorative covers. Having a helper on hand can make lifting and securing fixtures easier and safer.
3. Safety Precautions Before Installation
Safety is paramount when installing a ceiling lamp; skipping precautions can lead to electric shock or damage. First, find the circuit breaker for the room where the lamp will be installed and turn it off. Use a voltage tester to verify that power is completely off at the fixture’s wiring.
Wear safety glasses to protect your eyes from dust or falling debris and insulated gloves to prevent electric shock. Set your ladder on a flat, stable surface, and have a helper steady it. Confirm that your electrical junction box is rated to support your ceiling lamp’s weight; if not, hire a professional to upgrade it.
Never attempt to install a ceiling lamp if you’re unfamiliar with electrical wiring or feel uncomfortable working with electricity.
4. Remove the Old Ceiling Lamp
If replacing an existing fixture, start by removing the old ceiling lamp to prepare the area for the new one. After turning off power, remove the light bulbs and decorative covers carefully. Unscrew the fixture base from the ceiling.
Support the lamp with one hand or have a helper hold it while you disconnect the electrical wires by unscrewing the wire nuts during the process of how to install a ceiling lamp. If wires are connected with electrical tape, carefully unwrap it. Remove the old mounting bracket if needed, and inspect the junction box for any damage or loose wiring before proceeding further in your ceiling lamp installation.
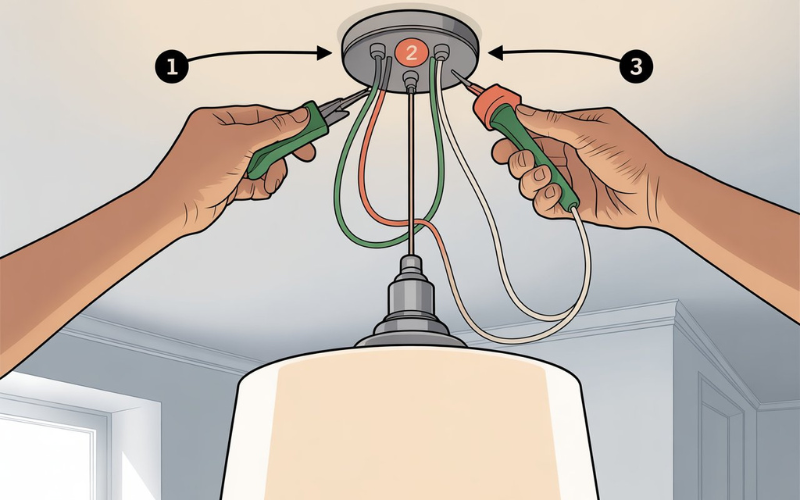
5. Wiring Your New Ceiling Lamp
Proper wiring is the most critical step when learning how to install a ceiling lamp safely and successfully. Typically, the wires consist of:
- Black (hot/live)
- White (neutral)
- Green or bare copper (ground)
Use wire strippers to remove about half an inch of insulation from each wire end. Connect wires color to color: black to black, white to white, and ground to ground. Twist wires together and secure with wire nuts; then wrap connections with electrical tape for additional safety.
Carefully fold the wires back into the junction box, ensuring no sharp bends or pinching.
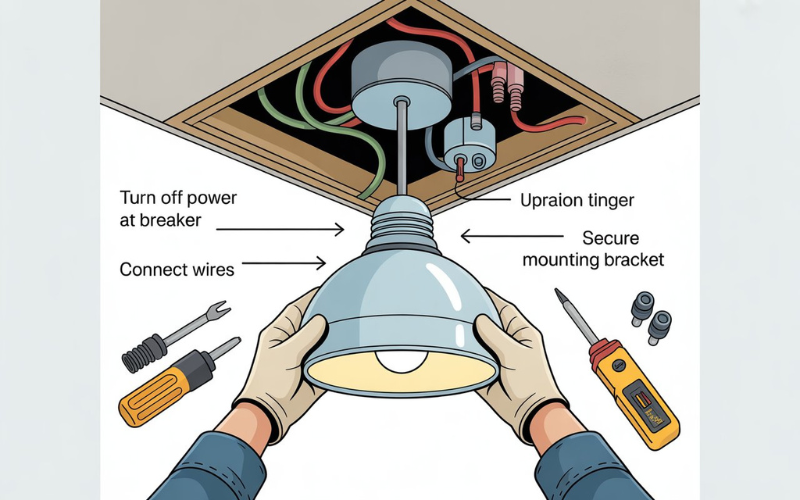
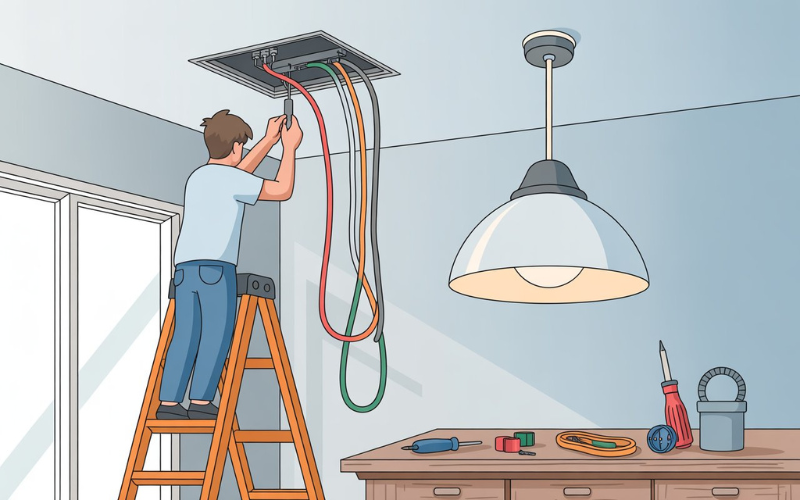
6. Mounting Your Ceiling Lamp Fixture
With wiring completed, the next step in how to install a ceiling lamp is physically securing the fixture. Attach the mounting bracket provided with your lamp to the ceiling junction box. Align the fixture base holes with the bracket and insert screws or bolts.
Tighten screws gradually and evenly to avoid tilting. The fixture should be flush against the ceiling and secure without wobbling. If your ceiling lamp is heavy, consider adding safety cables or chains for extra support as instructed by the manufacturer.
7. Installing the Canopy and Bulbs
The canopy is the decorative cover that hides the mounting hardware and junction box. Slide or clip the canopy into place according to the instructions. Tighten any screws to hold it firmly.
Install bulbs recommended by the manufacturer, adhering to maximum wattage suggestions to avoid overheating. LED bulbs are preferred for energy efficiency and long life.
8. Testing Your Ceiling Lamp
Before turning power back on, double-check your wire connections and mounting stability. Turn the circuit breaker back on and use the wall switch to test the lamp. The light should turn on smoothly and remain stable.
If the lamp doesn’t work, turn off power again and check wire nuts for loose connections. Try new bulbs if lighting issues persist. If problems continue, consult a qualified electrician.
9. Maintenance Tips for Longevity
Post-installation, maintain your ceiling lamp by cleaning regularly with a soft cloth and mild cleaner for glass or metal parts. Inspect mounting screws and wire connections annually, tightening as needed.
Replace bulbs promptly with recommended types and wattage. Proper maintenance keeps your ceiling lamp functioning well and looking great.
10. Common Installation Mistakes to Avoid
A comprehensive section covering the most frequent errors people make when learning how to install a ceiling lamp, including not turning off power, mismatched wiring, improper support for heavy fixtures, and improper canopy installation. This section helps readers avoid costly mistakes.
11. Professional Installation: When to Call an Expert
Guidance on recognizing situations where professional help is necessary for ceiling lamp installation, such as structural modifications, new electrical circuits, complex fixtures, damaged wiring, or personal discomfort with electrical work.

FAQs
Q1. Do I need an electrician to install a ceiling lamp?
A. You can install a ceiling lamp yourself if you have basic electrical knowledge and carefully follow safety precautions. However, if the installation requires new wiring, heavy fixture support, or if you’re uncertain about handling electrical components, hiring a licensed electrician is recommended for safety and code compliance.
Q2. How long does it take to install a ceiling lamp?
A. A standard ceiling lamp installation usually takes between one to two hours. This includes turning off power safely, removing any existing fixture, wiring the new lamp correctly, mounting it securely, and testing the installation.
Q3. What tools are essential for ceiling lamp installation?
A. Key tools include a voltage tester, wire strippers, screwdrivers (Phillips and flathead), needle-nose pliers, electrical tape, wire nuts, and a stable ladder. Safety gear such as insulated gloves and safety glasses are also highly recommended.
Q4. What if my ceiling electrical box can’t support the lamp’s weight?
A. If your ceiling box is not rated for heavy fixtures like chandeliers, it must be replaced or reinforced with a fan-rated or heavy-duty box. Improper support risks fixture failure and poses serious safety hazards.
5. Can I install a ceiling lamp without turning off the power?
A. No. Always turn off power at the circuit breaker and verify with a voltage tester before beginning any wiring to eliminate the risk of electric shock.
Conclusion
Mastering how to install a ceiling lamp is a rewarding DIY skill that enhances your home’s lighting and saves you money on professional installation. By carefully selecting the right fixture, preparing all necessary tools, and strictly following safety precautions, you can successfully install your ceiling lamp with confidence. Proper wiring, secure mounting, and thorough testing ensure your new ceiling lamp functions efficiently and safely.